For my final project design I wanted to build something useful. Something I wanted to have but just didn't have the funds or resources to obtain/build. I came up with a street winch. I've always enjoyed watching street skiing and snowboarding videos and have tried to hit some street spots with some friends. Me and my friends always run into the same problem. No speed. The pros don't run into this problem because they have a winch. You can see the use of a winch in many ski/snowboarding movies and they are obviously very helpful. You can purchase a pre built winch usually from overseas for roughly a couple thousand dollars. I built mine for less than $500.
I started this project very slowly. Mapping out what I needed to start building and watching videos on other people building their own winches. First thing I did was order the pieces of my spool; threaded rods, metal covers, grinder blades, and corresponding nuts, bolts and washers. I cut my threaded rod into six 11.5" long pieces, then the covers into six 10.5" long pieces. I then mapped out where I wanted to drill holes into my grinder blade so I could put the rods through the blade to make the spool. To get my cuts as exact as possible I used Adobe Illustrator to model a guide for my grinder blades (shown below).
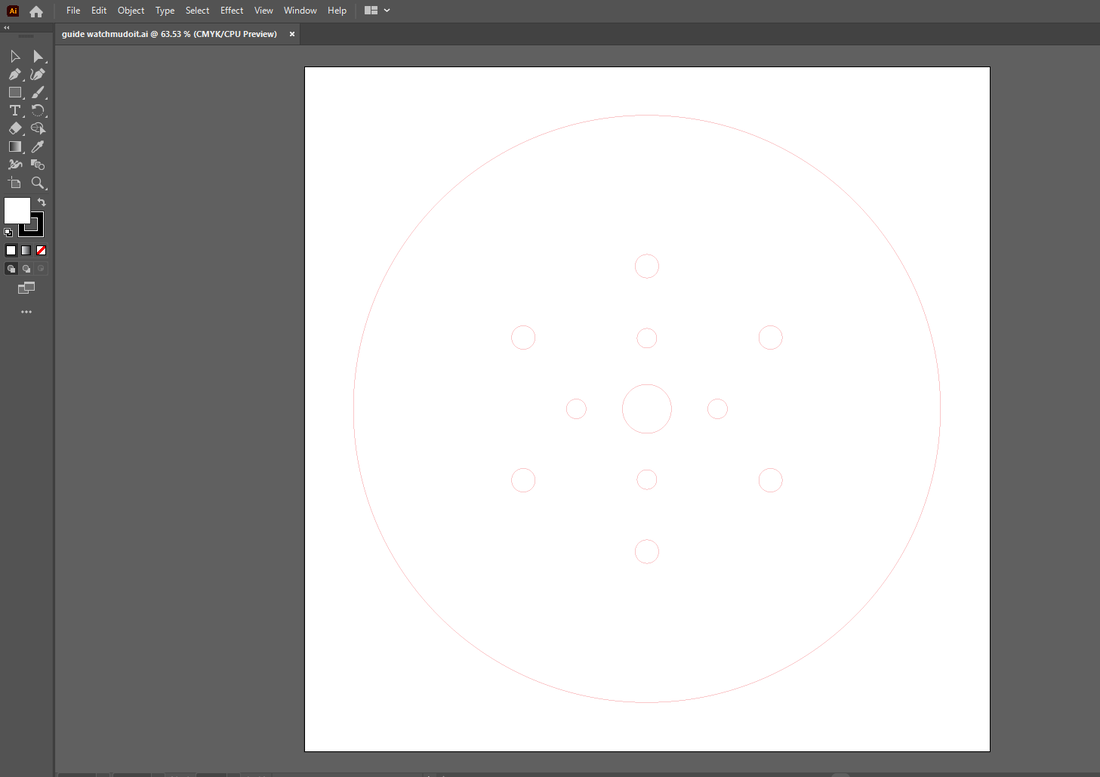
I laser engraved this model onto matboard, then used it as a guide to drill my holes into my grinder blades. after this was done I was able to put my spool together.
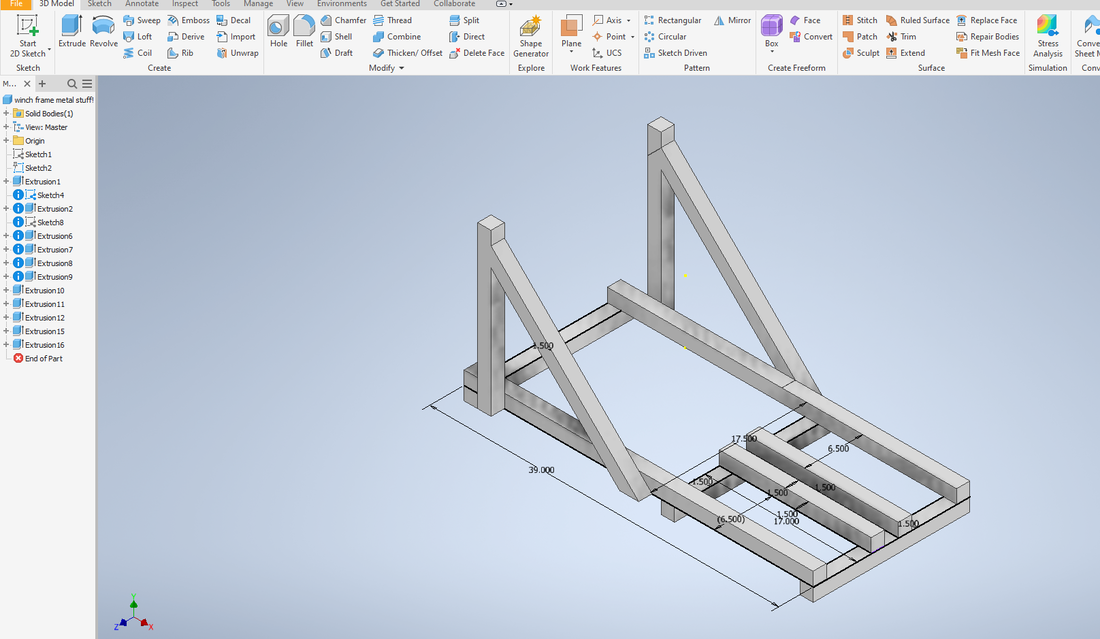
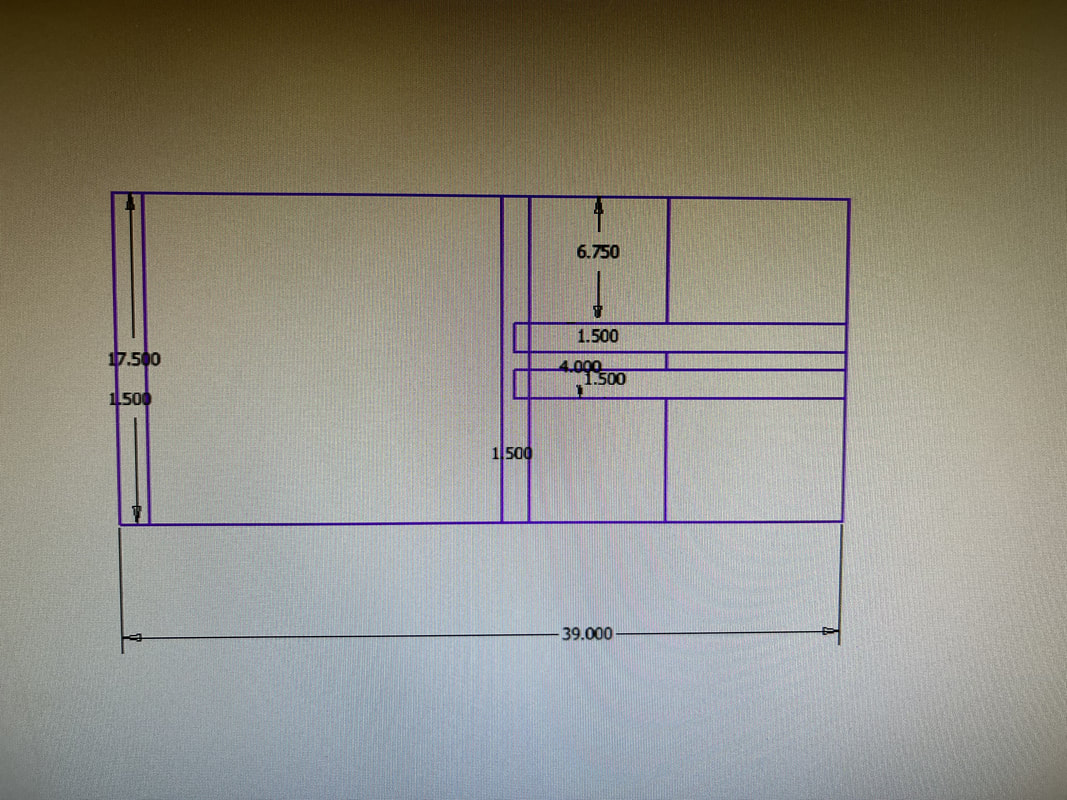
Next I purchased metal strut that I was going to build my frame out of. To figure out the lengths I wanted my frame to be I created a model in Inventor, this helped me create a cut list and know how many pieces I needed to build my frame. Some of these lengths changed overtime due to me messing up or running short on materials but this rough draft model helped me start cutting.
|
|
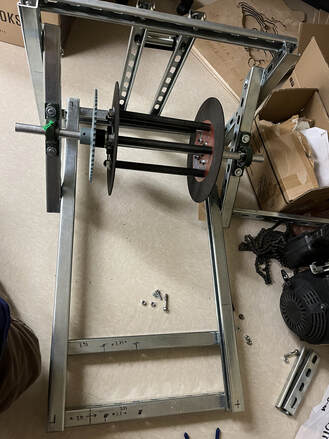
Once I cut the base pieces out, I was able to start putting things together. Each separate piece of strut is joined together with a screw, washer, and nut. After I remeasure everything I was able to cut my side pieces and attach my spool.
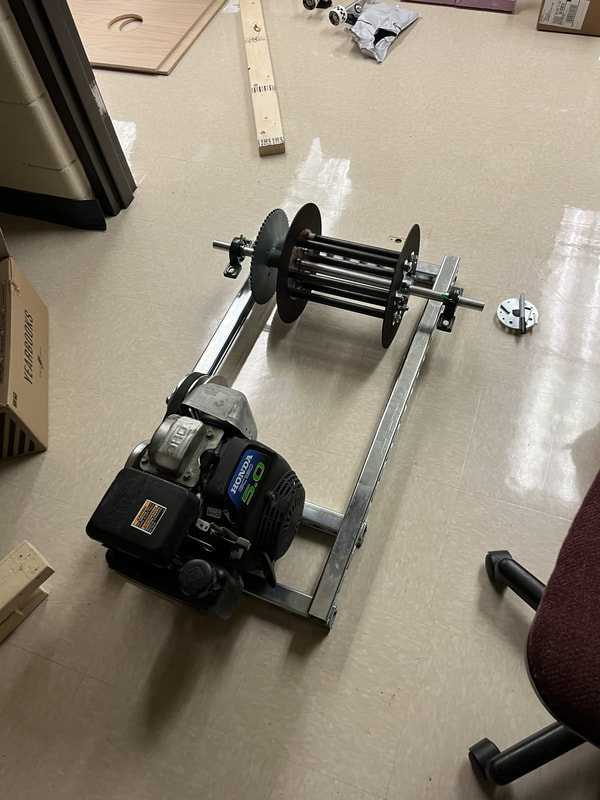
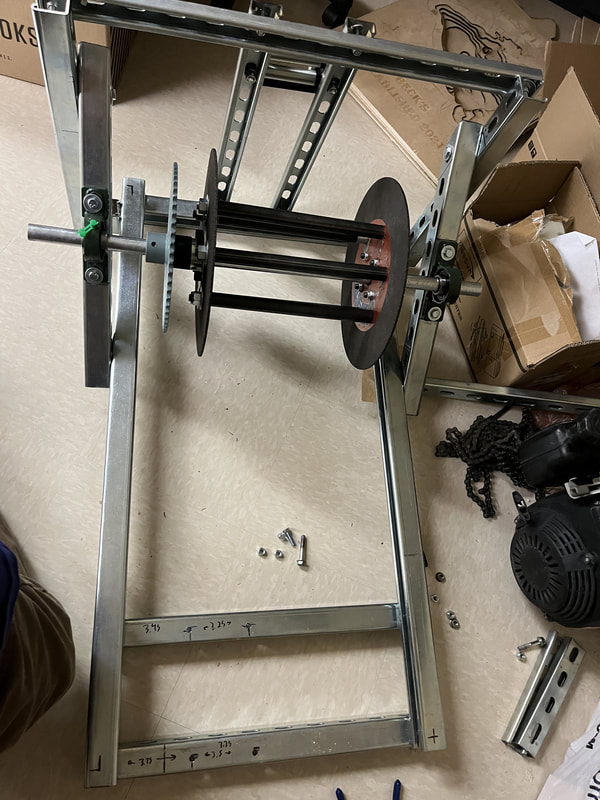
Frame with winch and motor on top of it.
|
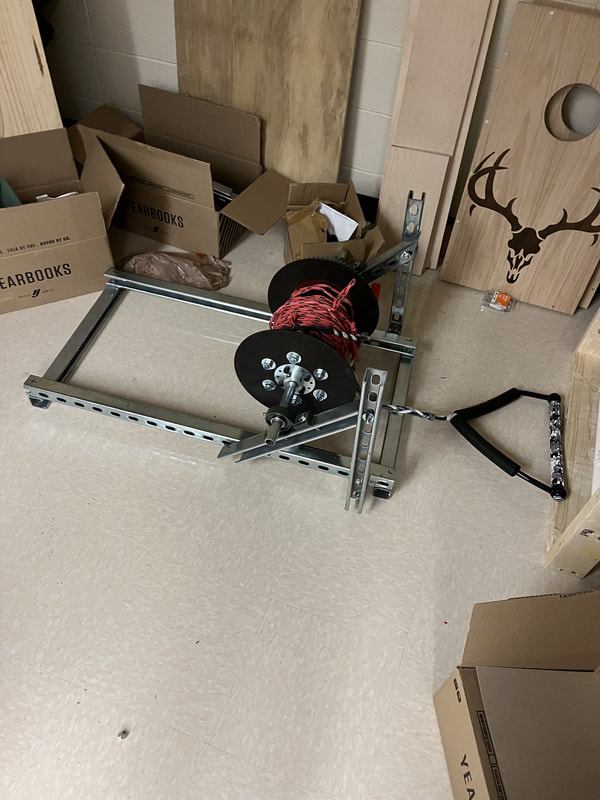
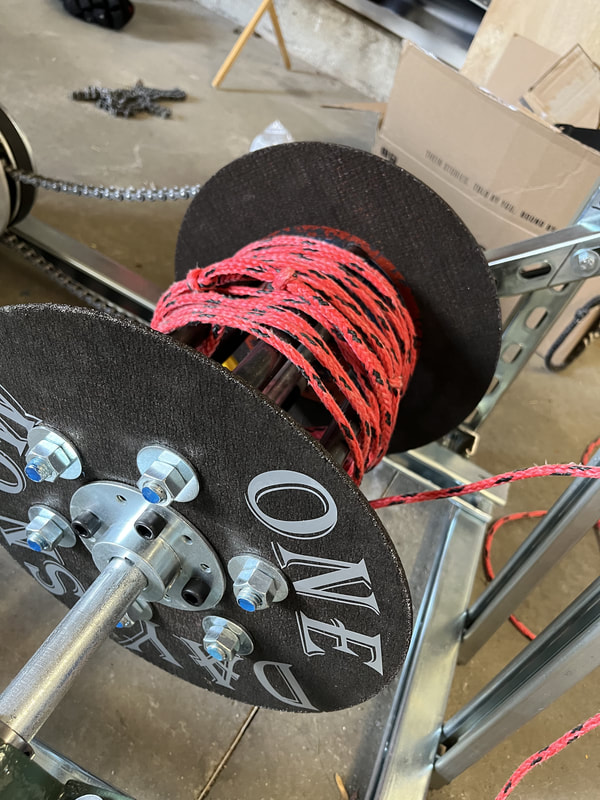
Winch attached to frame by side pieces.
|
I was waiting to put the winch fairlead on because it had not arrived in the mail until after I had built all this, so I was able to measure and figure out how I wanted to fit the fairlead onto the frame. I cut 3 more pieces to reinforce the frame and hold my fairlead.
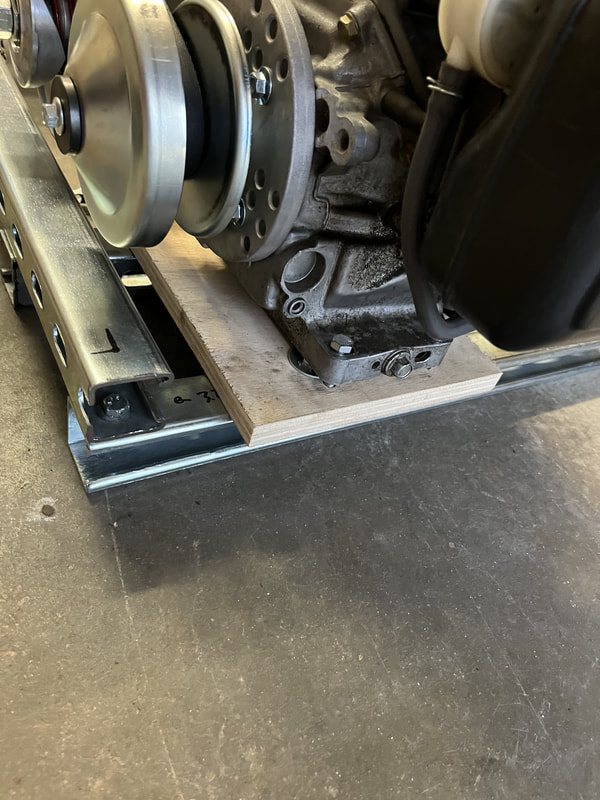
I ran into a problem with mounting my motor because I had drilled my holes unevenly. To fix it I cnc routed a piece of plywood with holes to match up with my mistake holes and with four more holes to mount my motor on top of.
|
|
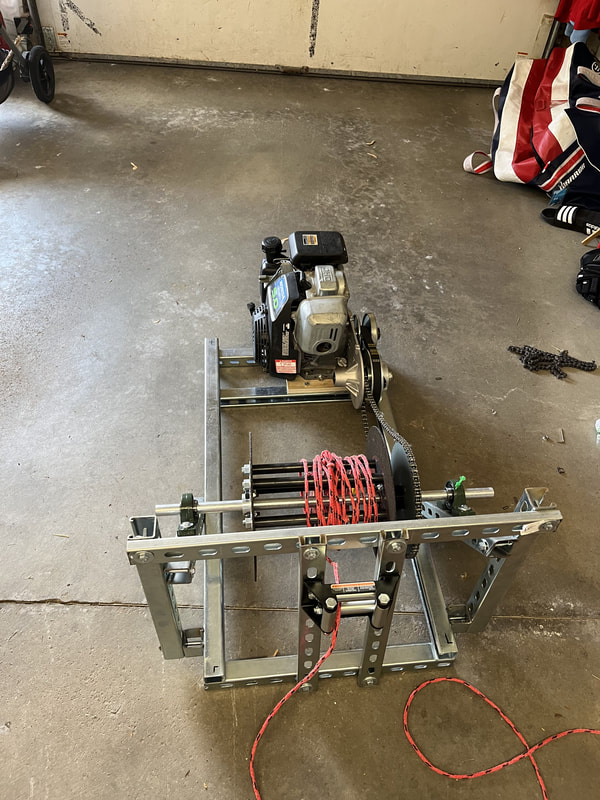
After I screwed the motor on and attached the chain I was all done. I added some decals I cut with the vinyl cutter to add a little personalization to it and I took it home! Unfortunately I can not fully test it because it is made for snowboarding and its summer, but I took the rope out and it spins and everything works together!
This final project taught me a lot. I mostly learned how to use my time well. I also relearned how to use multiple machines I hadn't used for over a year. I feel confident that if I receive a project with a deadline far away I will not procrastinate as much and start to use my time and recourses right away instead of waiting them.
